Guide to DIY Window Installation
Window installation is one of those home improvement projects that can seem daunting, especially if you’re new to DIY. However, with the right tools, a clear plan, and a bit of patience, you can successfully install new windows in your home, saving money and adding value to your property. This step-by-step guide will walk you through the process, from preparation to finishing touches.
Why Install New Windows?
Before diving into the how-to, it’s important to understand why you might want to install new windows in the first place. New windows can provide better insulation, reduce energy costs, improve the aesthetic appeal of your home, and even increase its value. Whether you’re replacing old, drafty windows or installing them in a new space, this guide will help you achieve a professional-looking result.
Step 1: Gather Your Tools and Materials
The first step in any DIY project is ensuring you have the necessary tools and materials. For window installation, you’ll need the following:
- New windows: Ensure they are the correct size for your openings.
- Tape measure: For accurate measurements.
- Level: To ensure your windows are perfectly aligned.
- Hammer and nails: For securing the window.
- Screwdriver or drill: To drive screws into place.
- Utility knife: For cutting through caulk or sealant.
- Caulk and caulking gun: To seal around the window.
- Shims: For adjusting the fit of the window.
- Pry bar: To remove old windows and trim.
- Safety gear: Including gloves, safety glasses, and possibly a dust mask.
Step 2: Measure the Opening
Accurate measurements are crucial for a successful window installation. Measure the width and height of the window opening at three points: top, middle, and bottom for width, and left, center, and right for height. Use the smallest measurement for your new window size, ensuring a snug fit.
Pro Tip: Double-check your measurements before purchasing your windows to avoid costly mistakes.
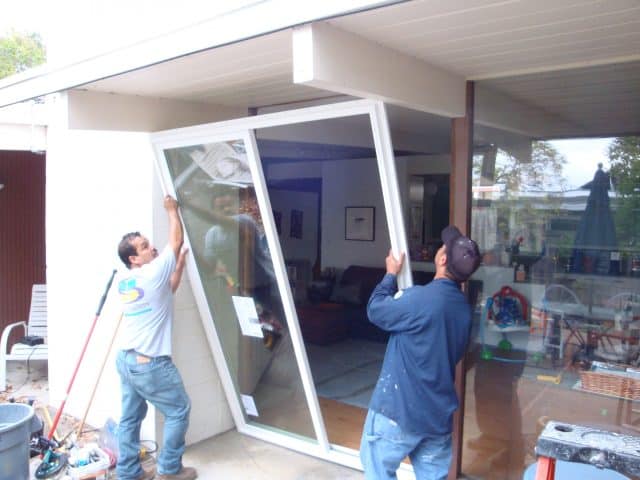
Step 3: Remove the Old Window
If you’re replacing an existing window, you’ll need to remove it carefully. Start by removing any interior trim using a pry bar. Be gentle to avoid damaging the surrounding wall. Next, cut through any caulk or paint around the window frame with a utility knife. Once the old window is free, carefully remove it from the opening.
Pro Tip: If the window is stuck, use a pry bar to gently loosen it, working your way around the frame.
Step 4: Prepare the Opening
With the old window removed, inspect the window opening for any damage or rot. If you find any, now is the time to repair it. Check that the opening is square by measuring diagonally from corner to corner. The measurements should be equal; if not, use shims to adjust the opening.
Next, clean the opening thoroughly, removing any old caulk, sealant, or debris. This ensures a clean surface for the new window to sit on, helping it seal properly.
Step 5: Dry Fit the New Window
Before permanently installing the window, do a dry fit to ensure it fits properly in the opening. Carefully place the window into the opening, checking that it sits evenly and is level. Use shims as needed to adjust the fit. The window should fit snugly without being forced into place.
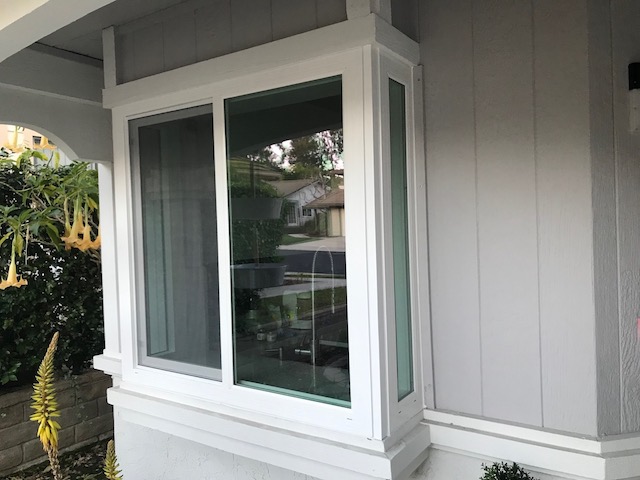
Step 6: Install the Window
Once you’re satisfied with the fit, it’s time to install the window permanently. Apply a bead of caulk around the outside edge of the window frame where it will meet the opening. This helps create a weatherproof seal.
Carefully place the window into the opening, pressing it firmly into the caulk. Use shims to ensure the window is level and plumb (vertically aligned). Once the window is properly positioned, secure it with nails or screws, starting with the top corners and working your way down. Be careful not to over-tighten, as this can warp the window frame.
Pro Tip: Check that the window operates smoothly before securing it completely.
Step 7: Seal the Window
With the window securely in place, it’s time to seal it to prevent drafts and water intrusion. Apply a bead of caulk around the outside perimeter of the window, filling any gaps between the window frame and the opening. Smooth the caulk with your finger or a caulk smoothing tool to ensure a neat, even finish.
Next, install the interior trim you removed earlier, or replace it with new trim if necessary. Use finishing nails to secure the trim in place, and fill any nail holes with wood putty. Finally, apply a bead of caulk around the trim where it meets the wall to seal any gaps.
Step 8: Insulate Around the Window
Proper insulation around the window is essential for energy efficiency. Use expanding foam insulation to fill any gaps between the window frame and the wall. Be careful not to overfill, as the foam can expand and warp the window frame. Trim any excess foam with a utility knife once it has fully cured.
Pro Tip: Use low-expansion foam specifically designed for windows and doors to avoid putting too much pressure on the window frame.
Step 9: Finish the Exterior
To complete the installation, finish the exterior of the window by applying flashing tape around the edges. This provides an additional layer of protection against water intrusion. Install exterior trim or siding to cover the edges of the window and complete the look. For more insights and further information about sliding glass door installation, you can visit their page to learn more.
Finally, apply a bead of caulk around the exterior trim to seal any gaps. This helps keep out moisture and air, ensuring your new windows are energy-efficient and weatherproof.
Step 10: Final Inspection and Cleanup
With the window fully installed, take a moment to inspect your work. Ensure the window opens and closes smoothly, and that all gaps are properly sealed. Check the caulking around the window, both inside and out, to ensure a continuous, watertight seal.
Once you’re satisfied with the installation, clean up your workspace. Dispose of any old windows, trim, and other debris according to local regulations. Clean the new window glass with a non-abrasive cleaner, and step back to admire your handiwork.
Conclusion
Installing new windows can be a rewarding DIY project that enhances your home’s appearance, comfort, and energy efficiency. By following this step-by-step guide, you can achieve professional results without the need for a contractor. Remember, the key to a successful window installation is careful preparation, accurate measurements, and attention to detail. With these principles in mind, you’ll be well on your way to a beautiful and functional window installation that will serve your home for years to come.